Nodes Browser
ComfyDeploy: How Image Metadata Nodes works in ComfyUI?
What is Image Metadata Nodes?
Nodes for loading and saving images with metadata in ComfyUI.
How to install it in ComfyDeploy?
Head over to the machine page
- Click on the "Create a new machine" button
- Select the
Editbuild steps - Add a new step -> Custom Node
- Search for
Image Metadata Nodesand select it - Close the build step dialig and then click on the "Save" button to rebuild the machine
ComfyUI Image Metadata Nodes
Version: 1.0.1
Author: Light-x02
Support My Work
If you find this project useful, you can support my work on Ko-fi:
https://ko-fi.com/light_x02
Description
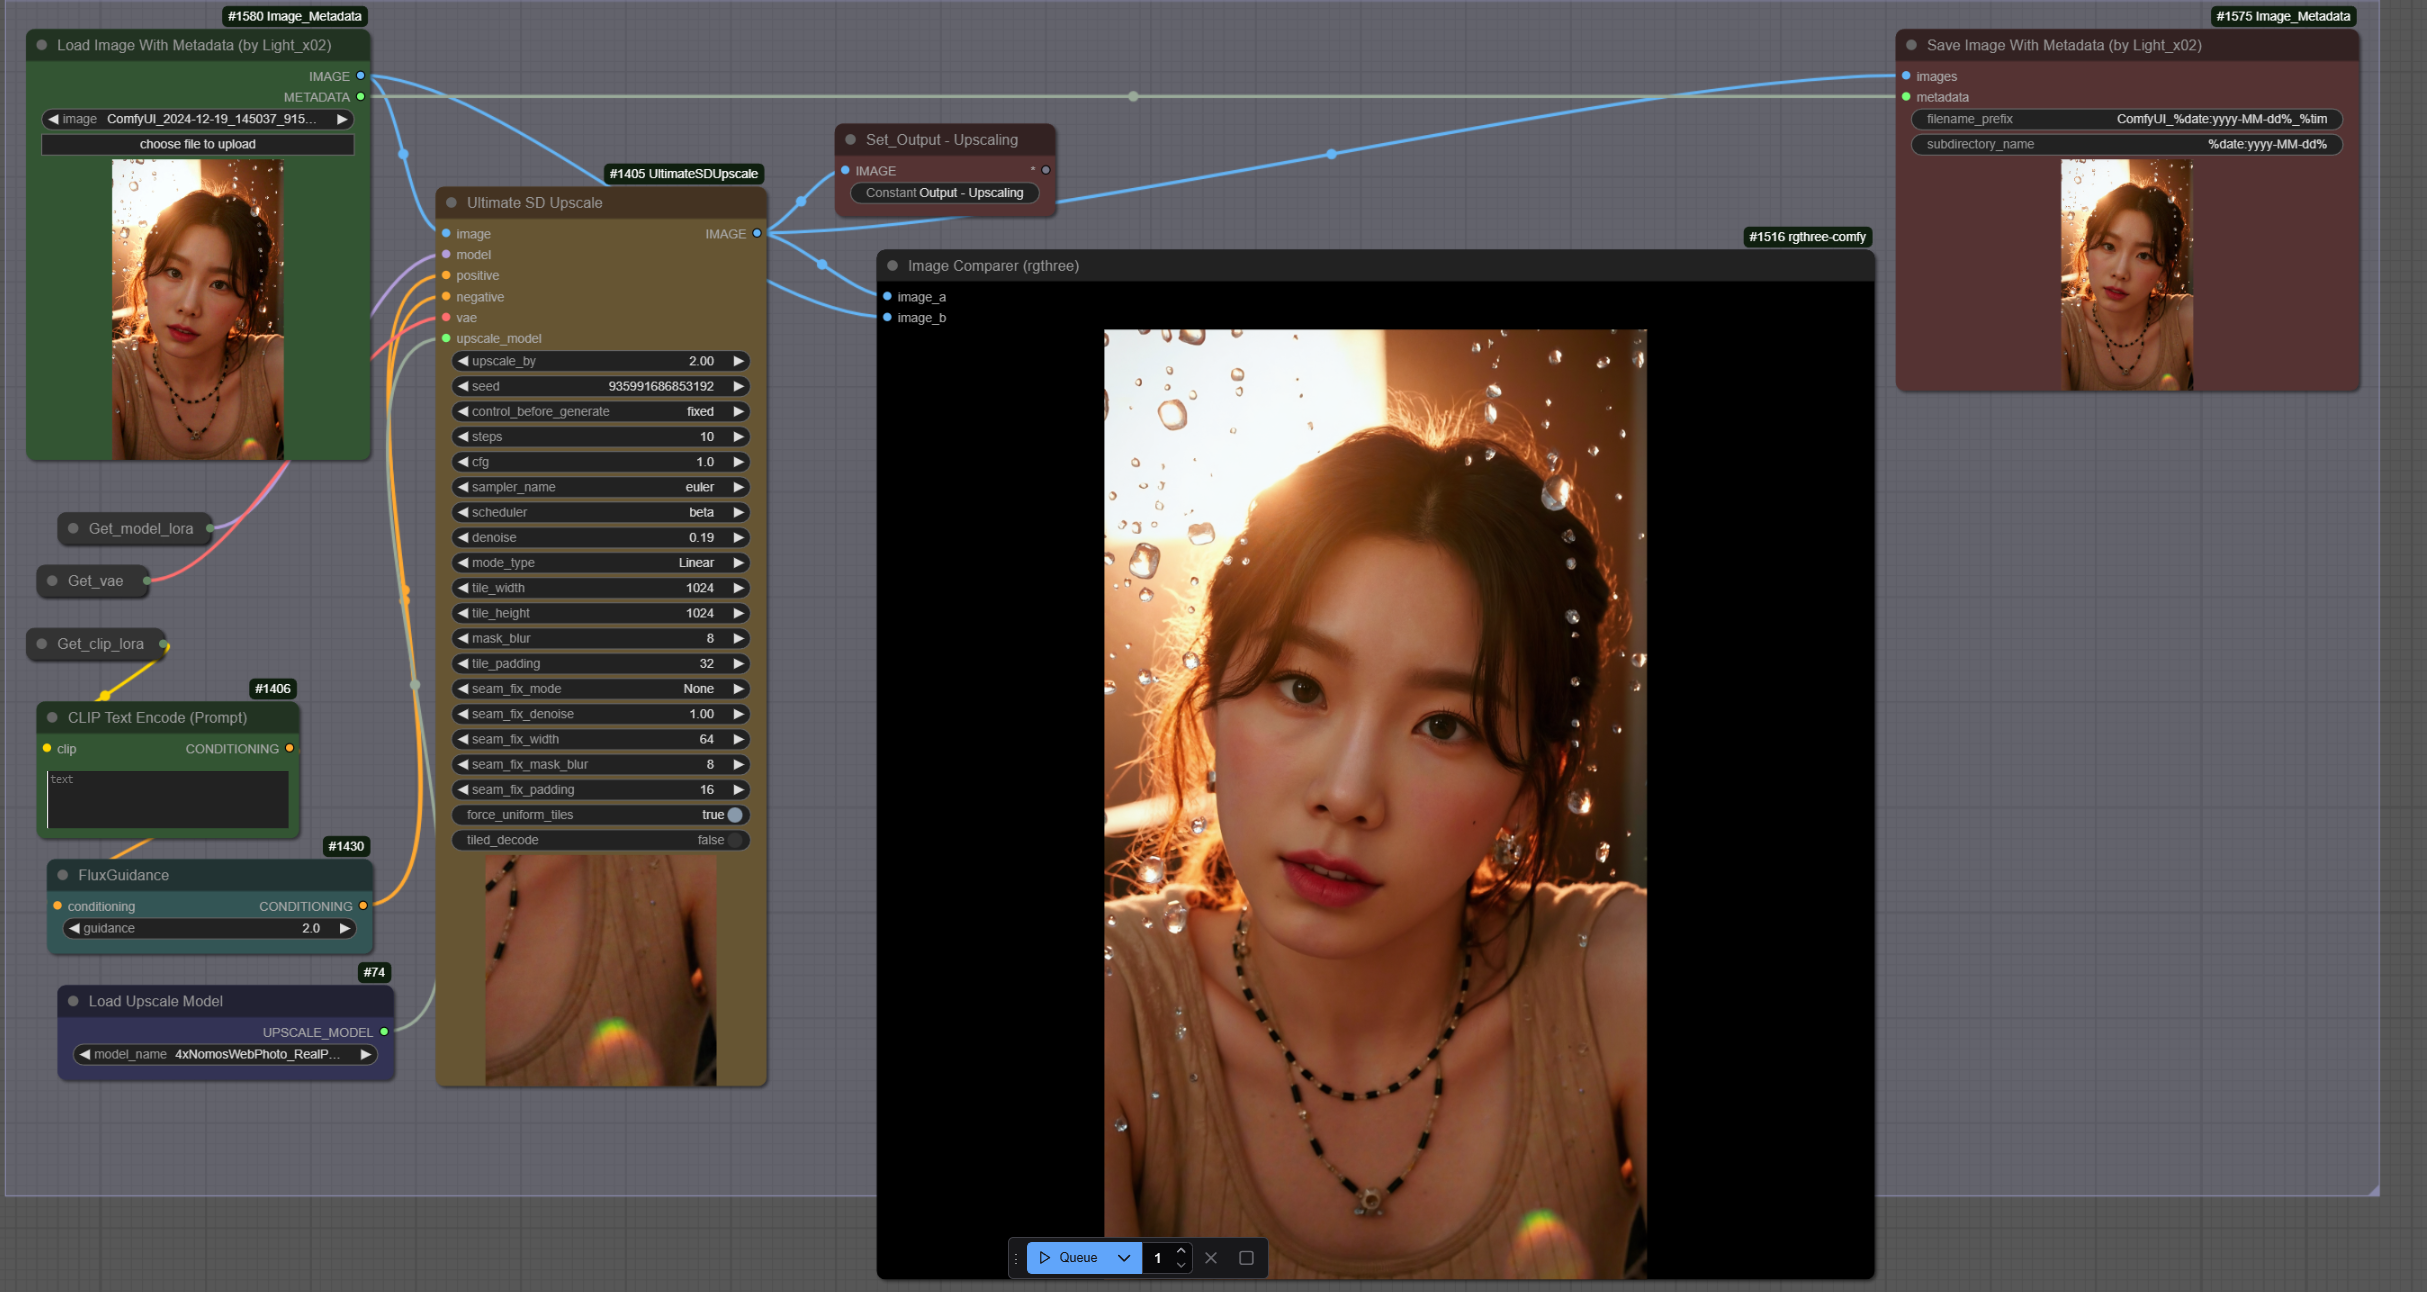
This project provides two complementary nodes for ComfyUI, allowing you to load and save images while preserving their metadata intact. These nodes are particularly useful for workflows that require image adjustments, such as upscaling, without altering the original metadata.
How It Works
Metadata Loading
The Image Metadata Loader node imports an image while extracting its original metadata, which can then be passed to other nodes.
Metadata Saving
The Image Metadata Saver node saves an image with its original, unchanged metadata embedded directly in the generated PNG file.
By connecting these two nodes through the METADATA output/input, you can import a previously generated image with correct metadata, modify it (e.g., using upscaling), and save it while preserving the metadata intact.
Features
- Supported Formats: Load and save in PNG format (metadata is directly embedded in the file).
- Dynamic Metadata Management: Preserves original metadata, even in complex workflows.
- Advanced Compatibility: Metadata is correctly embedded in the final PNG file.
Installation
Method 1: Install via ComfyUI Manager
- Open ComfyUI.
- Go to the Custom Nodes section in the interface.
- Search for "Image Metadata Nodes" and install it directly from the ComfyUI Manager.
- Restart ComfyUI
Restart ComfyUI to load the nodes.
Method 2: Clone the Repository
- Open a terminal or command prompt.
- Run the following command to clone the repository:
git clone https://github.com/Light-x02/ComfyUI-Image-Metadata-Nodes.git - Restart ComfyUI
Once the files are in place, restart ComfyUI to load the nodes.
Manual Installation
-
Download or Clone the Project
https://github.com/Light-x02/ComfyUI-Image-Metadata-Nodes -
Move the Folder to Your ComfyUI Directory
Copy the folderComfyUI_Image_Metadatainto thecustom_nodesdirectory of your ComfyUI installation. -
Restart ComfyUI
Once the files are in place, restart ComfyUI to load the nodes.
Usage
Included Nodes
Image Metadata Loader
- Description: Loads an image and extracts its metadata.
- Outputs:
IMAGE: The loaded image.METADATA: The raw metadata.
Image Metadata Saver
- Description: Saves an image with unchanged metadata.
- Inputs:
IMAGE: The image to save.METADATA: The metadata to include.- Options:
- Filename Prefix: Prefix for the file name (e.g.,
%date:yyyy-MM-dd%). - Subdirectory Name: Name of the subdirectory for saving files.
Example Workflow
- Use the Image Metadata Loader node to load an image and retrieve its metadata.
- Modify the image (e.g., with an upscaling or retouching node).
- Connect the
METADATAoutput of the loader to theMETADATAinput of the saver. - Use Image Metadata Saver to save the image with intact metadata.

Additional Notes
To save metadata in my PNG files when generating images with txt2img workflows, I use the extension "ComfyUI-ImageMetadataExtension", which is available here. This ensures that platforms like Civitai automatically detect the metadata.
Contribution
Contributions are welcome! If you want to report a bug or suggest an improvement, open an issue or submit a pull request on the GitHub repository.